이미지를 전송 받는 서버를 위해 고군분투 했던 저의 피 땀 눈물을 담은 글입니다. 나중에 똑같은 일을 두번 겪고 싶지 않아서 제가 했던 과정들을 기록해 볼게요

첫번째 난관은 바로 POST 요청 경로를 지정하는 것 이었습니다. Node.JS 서버만 사용했다면 손쉽게 해결할 수 있었을 탠데 저는 Nginx를 사용해서 리버스 프록시를 해놓은 상태였습니다. 즉, 직접 Node 서버에 접근할 수 없고 Nginx가 대신 요청을 받아 서버로 요청을 전송하는 구조입니다. Nginx.config 파일을 한번 살펴보겠습니다.
# nginx.conf
upstream nodeserver {
    server node:3000;
}

server {
    listen 80;

    location / {
        proxy_pass      http://nodeserver/;
        rewrite /node/(.*) /$1 break;
        proxy_redirect    default;
        proxy_set_header  Host $host;
        proxy_set_header  X-Real-IP $remote_addr;
        proxy_set_header  X-Forwarded-For $proxy_add_x_forwarded_for;
        proxy_set_header  X-Forwarded-Host $server_name;
    }

    location db/upload {
        alias /store_images_volume/;
    }
}
구조를 살펴보면 현재 localhost(root):80 경로로 들어오는 요청에 대한 요청을 받아 Upstream에 정의된 Node.JS의 port인 3000번으로 proxy 해주고 있습니다. 이 요청은 Node.JS 코드에서 app.get('/', (req, res) => { } ) 로 전달 됩니다.
그래서 저는 GET이 아닌 POST요청에 대한 경로를 만들어야 했습니다. location db/upload 에서 db/upload 는 특별한 경로가 아니라 제가 그냥 맘대로 지정해줄 수 있는 경로였고 http://db/upload 로 요청을 줄 수 있었습니다.
즉, localhost 대머리/빡빡이 이런식으로 맘대로 줄 수 있는 경로였단 겁니다!! 그래서 해당 경로를 지정하고 NodeJS에서는
app.post("db/upload") 로 경로를 지정해주면 POST 요청을 받을 수 있었습니다.

// server.js
const express = require('express');
const multer = require('multer');
const crypto = require('crypto');
const mysql = require('mysql2');
const app = express();
const port = 3000;

// Localhost:80 또는 3000으로 들어오는 요청을 받음
app.get('/', (req, res) => {
    res.send("Docker With Nodejs")
})

app.use(express.json());
app.use(express.urlencoded({ extended: true }));

//정적 파일 제공하기위한 static
//현재 '/imgaes' 의 디렉토리에 있는 정적 파일에 외부 접근을 허용한 상태
app.use(express.static('/store_images_volume'));


// 디스크에 이미지 저장을 위한 multer 설정
const storage = multer.diskStorage({
    destination: '/store_images_volume',
    filename: (req, file, cb) => {
        const fileName = 'main_img.' + Date.now() + file.originalname.split('.').pop();
        cb(null, fileName);
    }
});

const upload = multer({ storage: storage });

// MySQL 연결 설정
const connection = mysql.createConnection({
    host: 'mysql',
    user: 'root',
    password: 'root',
    database: 'cloudbridge_database'
});

app.post("/db/upload", upload.single('storeimage'), (req, res) => {
    console.log("post 요청이 수신 되었습니다.");

    try {
        const file = req.file;
        const storename = req.body.storename;
        const ceoName = req.body.ceoName;
        const CRN = req.body.CRN;
        const contact = req.body.contact;
        const address = req.body.address;
        const latitude = req.body.latitude;
        const longitude = req.body.longitude;
        const kind = req.body.kind;

        if (file) {
            const filePath = file.path;

            connection.query(
                'INSERT INTO STORE_INFO(STORENAME, IMAGE_PATH, ceoName, CRN, contact, address, latitude, longitude, kind) VALUES (?, ?, ?, ?, ?, ?, ?, ?, ?)',
                [storename, filePath, ceoName, CRN, contact, address, latitude, longitude, kind],

                (err, results, fields) => {
                    if (!err) {
                        console.log("이미지가 성공적으로 저장되었습니다.");
                        res.send("이미지가 성공적으로 저장되었습니다.");
                        //res.status(200).send("이미지가 성공적으로 저장되었습니다.");
                    } else {
                        console.error("이미지 저장 실패: ", err);
                        res.send("이미지가 저장 실패.");
                        //res.status(200).send("이미지 저장 실패");
                    }
                }
            );
        }
    } catch (err) {
        console.error(err);
        //res.status(500).send("오류 발생");
    }
});

app.listen(port, () => {
    console.log("서버가 3000 포트에서 실행 중입니다.");
});
두번째 난관은 바로 이미지를 전송 받아 저장하는 폴더를 만드는 것 이었습니다. 저의 목표는 바로 저 uploads 폴더에 전송 받은 사진을 저장하는 것이었습니다. storage를 선언하는 구문에 destination이 이미지를 저장할 폴더를 지정하는 구문입니다. 그러나 무슨 짓을 해도 폴더에 저장이 안됐습니다. 그러다 문득 이런 생각이 들더군요
서버를 전부 Docker로 만들지 않았나?

그렇습니다. Docker Container로 만들었으니 당연히 제 컴퓨터의 로컬 폴더에 접근할 수 없었고 destination에 지정하는 경로는 제 로컬 폴더가 아닌 Node.JS 서버에 있는 폴더였습니다 !!! 😭😭
그리고 로컬 폴더와 NodeJS서버에 있는 폴더를 마운트하면 제가 원했던 데로 제 로컬 폴더에도 사진을 저장할 수 있었습니다. NodeJS DockerFile에서 폴더를 만들고 새로 만든 폴더와 제 로컬 폴더를 마운트 시켜서 사진을 저장했습니다.
# Node DockerFile
# store_images_volume 폴더 생성
RUN mkdir /store_images_volume

##############################################################################################
# docker-compose.yml
node:
    build:
      context: ./node_server
      dockerfile: Dockerfile
    ports:
      - "3000:3000"
    depends_on:
      - mysql
    networks:
      - db-net
    volumes:
      - ./node_server/uploads:/store_images_volume
요로케 요로케 서버측에도 사진이 잘 있고~
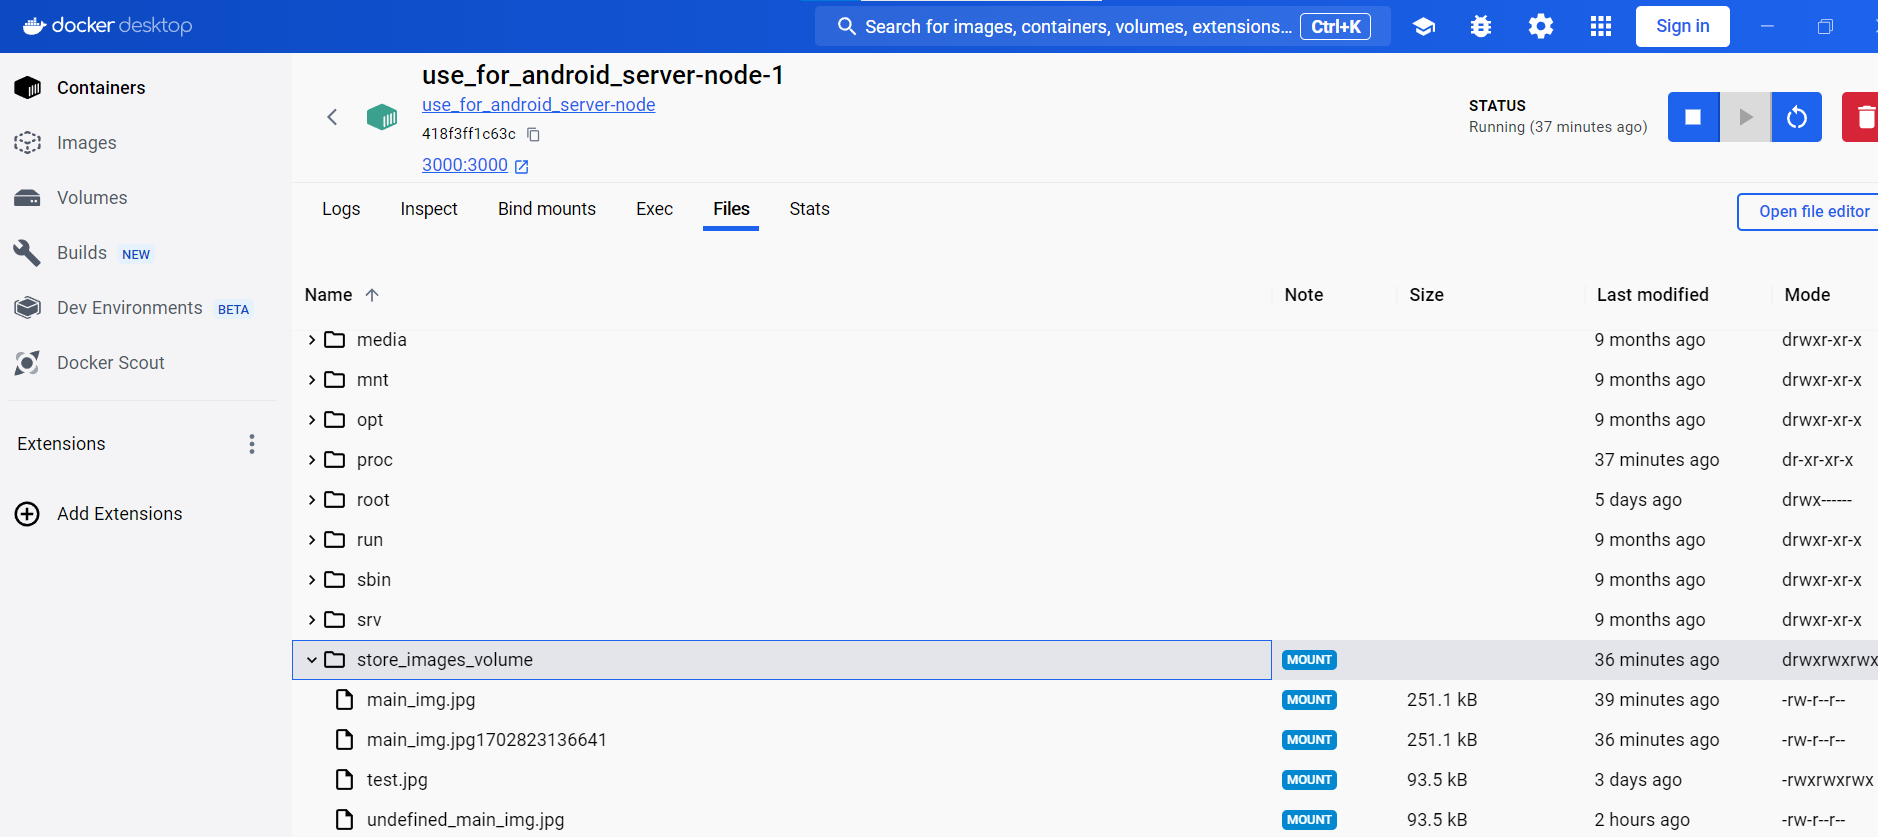
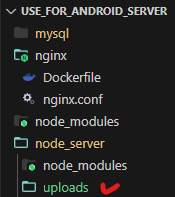
로컬 폴더에도 잘 있더랍니다 🤗

'BACK END' 카테고리의 다른 글
| 나도 할 수 있다 REST API (2) | 2023.12.29 |
|---|---|
| Error: Connect econnrefused (2) | 2023.12.12 |
| Docker + Node.js + Nginx 4 (0) | 2023.12.11 |
| Docker + Node.js + Nginx 3 (0) | 2023.12.11 |
| Docker + Node.js + Nginx 2 (1) | 2023.12.11 |