이미지를 저장하는 간단한 Node.js 서버를 만들어보겠습니다.

express 프레임 워크는 이전장에서 설치했으니 이 과정은 재끼겠습니다.

multer와 mysql2 패키지를 설치 합시다.
npm install --save multer mysql2Multer란?
Multer는 파일 업로드를 위해 사용하는 Node.js의 미들 웨어랍니다. multipart/form-data 형식으로 파일 업로드를 지원하기 때문에 가장 많이 사용해요.
첫번째로 필요한 모듈들을 호출해주고 포트 번호를 지정해줍니다. 저는 Node.js를 사용하니 포트 번호는 3000번이네요.
const express = require('express');
const multer = require('multer');
const mysql = require('mysql2');
const path = require('path');
const app = express();
const PORT = 3000;
MySQL 데이터베이스에 연결을 설정해줍니다. Database는 현재 사용중엔 Database의 이름을 지정해주면 됩니다.
// MySQL 연결 설정
const db = mysql.createConnection({
    host: 'localhost',
    user: 'root',
    password: 'root',
    database: 'cloud_bridge'
});

db.connect((err) => {
    if (err) throw err;
    console.log('MySQL connected');
});
multer 라이브러리를 사용해 이미지 업로드를 위한 설정해줍니다.
- destination : 업로드된 파일이 저장될 디렉토리를 지정
- filename : 업로드 된 파일의 이름을 결정하는 함수를 정의합니다.
- cb : callback의 줄임말로 JavaScript에서 비동기 작업이 완료 되었을 대 실행되는 함수로 여기선 새로운 파일에 대한 파일명을 생성합니다.
// 이미지 업로드를 위한 Multer 설정
const storage = multer.diskStorage({
    destination: './uploads',
    filename: (req, file, cb) => {
        cb(null, file.fieldname + '-' + Date.now() + '.jpg');
    }
});

// Multer 인스턴스 생성
const upload = multer({ storage: storage });
POST 요청을 통해 파일을 업로드 하고 파일 경로를 MySQL에 저장하기 위한 코드를 작성해 줍니다.
중요한 부분은 upload.single('img')에서 img 입니다.
현재 Key값이 img입니다. 따라서 Client에서 Key 값 사용을 img로 해서 전달해야 합니다.
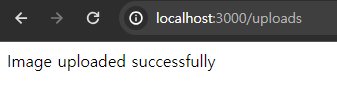
요청이 정상적으로 수행된다면 파일이 uploads 폴더에 저장됩니다.
app.use(express.static(path.join(__dirname, '')));
// 이미지 업로드를 처리하는 라우트
app.post('/uploads', upload.single('image'), (req, res) => {
const imagePath = req.file.path;
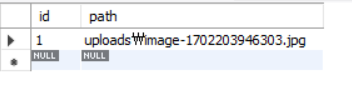
const sql = 'INSERT INTO images (path) VALUES (?)';
db.query(sql, [imagePath], (err, result) => {
if (err) {
console.error('Error inserting image path into MySQL:', err);
res.status(500).send('Internal Server Error');
} else {
console.log('Image path inserted into MySQL');
res.send('Image uploaded successfully');
}
});
});
app.listen(PORT, () => {
console.log(`Server is running on http://localhost:${PORT}`);
});
이제 간단한 HTML을 만들어 테스트 해보겠습니다. 이 때 눈여겨 볼 점은 enctype이 multipary/form-data라는 점입니다.
<!DOCTYPE html>
<html lang="en">
<head>
    <meta charset="UTF-8">
    <meta name="viewport" content="width=device-width, initial-scale=1.0">
    <title>Image Upload</title>
</head>
<body>
    <h1>Image Upload</h1>
    <form action="http://localhost:3000/uploads" method="post" enctype="multipart/form-data">
        <input type="file" name="image" accept="image/*">
        <button type="submit">Upload Image</button>
    </form>
</body>
</html>
이미지 하나를 지정해 upload 해줍니다.

MySQL에도 정상적으로 입력 되고 uploads 폴더에도 파일이 잘 저장 되었습니다 :)


'BACK END' 카테고리의 다른 글
| Docker + Node.js + Nginx 2 (1) | 2023.12.11 |
|---|---|
| Docker + Node.js + Nginx 1 (2) | 2023.12.10 |
| HTTP multipart/form-data (2) | 2023.12.10 |
| Nginx와 Node.js 쿵짝쿵짝 환경 구축하기 (1) | 2023.12.10 |
| Nginx 분석 (1) | 2023.12.09 |